
How to cheaply get decent SSL for your blog or website.
Why do you need a SSL Security Certificate for your website or blog?
Usually the need for a SSL certificate is related to the type of site your have. If you have a site where customers need to log in, or that processes transactions and forms, you’ll likely already use SSL, or HTTPS. Why should bloggers and general sites be concerned then? Well, 2017 is the year when Google is waging war on a non-secure web. With the release of it’s chrome browser update planned around 31st January 2017, sites without SSL certs installed will likely be flagged as untrusted. This means your readers and website visitors will be greeted with this image in their browser…
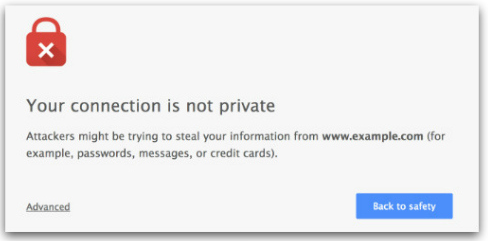
Now, readers can continue to your site by clicking the “Advanced” tab, but most will likely click back to safety. Your readership will suddenly drop. But there’s time to prepare and cheaply navigate around the issue.
Free Options (Hosting companies and Let’s Encrypt)
The first thing to do is contact your hosting company and look into their FREE SSL certification options to give your HTTPS status on your site and that illusive “green padlock”. Most should offer a free SSL, but it’s likely not great and will be limited in terms of how much it covers your site. The bigger your site grows, the less likely a free SSL from your provider will be adequate.
Some will allow you to install 3rd party SSL certificates from companies like CloudFlare or Let’s Encrypt; both of whom offer FREE SSL.
Some, like Bluehost who we were with, offered a shared SSL which was dire, and would charge you to install 3rd party SSL certificates. Bluehost wanted to charge to move to a dedicated IP and charge extras so I left them. I’d found their support hard to get on the phone and via live chat so I looked around at other hosting companies testing out their chat before buying. Bluehost offer a no quibble pro-rata refund on hosting so it wasn’t a big financial issue.

My choice of free £40+ SSL with GoDaddy, and why I went with them.
I found GoDaddy’s chat and call support really good, and easy to use in the UK. So I looked at their packages and opted for their Ultimate Hosting package which included a free top of the line £40+ certificate. The refund from Bluehost actually covered my hosting purchase with GoDaddy, which was nice. Plus there was the added perk of cashback from TopCashback, the switch actually made me money. And within a day I had the green padlock and secure SSL notification in the chrome browser.
I used the Ultimate hosting option that offered free SSL

Backup, Better Search and Replace, Force HTTPS
I can’t emphasise enough backing up your website. Before switching host or migrating, check out wordpress plugins like BackupBuddy or BackUpGuard. These offer free backup, of cheap migration options. Also if your hosting supports cPanel etc you should be already downloading regular backups of your site yourself.
Once on your new hosting, or even if you’ve stayed with your existing hosting, you’ll need to do a few things..
- Install the SSL Certificate in your Control Panel on your hosting account (Free or Paid)
- Install the plugin Better Search & Replace, you’ll need to use this after backing up. Use it to find and replace your URLs across your site with their new secure HTTPS tag. ie. replace http://example.com with https://example.com
- Lastly, install Force HTTPS plugin, then use it to push all pages to HTTPS.
- Once done, all traffic should divert to the secure HTTPS version of your site and you’ll get the green padlock of security.
NOTE: If you still get “non-secure”, try the Why No Padlock Site, this will show you what’s still not secure. I had a few plugins and images hosted elsewhere to tidy up, then it went green!